
Mount Any TV on Any Wall: All the Tools You Will Ever Need
When you mount any TV on the wall, experience counts for a lot. While it is more advisable to get a professional, we understand that many have the desire to attempt it themselves. Whether you’re a seasoned handyman or a newbie ninja with a can-do attitude, We’ve got you covered. Here’s a list of all the tools you’ll ever need to mount any TV on any wall yourself. Let’s get that screen up securely!
1. TV Mounting Bracket
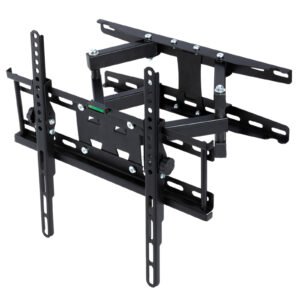
This is a no-brainer. Your TV mount is what will actually hold the TV on the wall. You will need to choose the right size for your TV and the type that fits your wall (drywall, brick, etc.). To make sure you get the right bracket for your TV, first, you want to check the VESA size on your TV. Look at the back of your TV and you will see 4 mounting holes which look like you can thread a screw or bolt into them. To work out your VESA standard measurement you need to take both a horizontal and vertical measurement (mm).
Another thing to consider is the size of the bracket that will go on the wall. We would recommend using a wider bracket when you mount any TV on plasterboard walls. This way, even if you don’t happen to find a stud, using spring toggles across a wider area can be just as secure.
2. Stud Finder
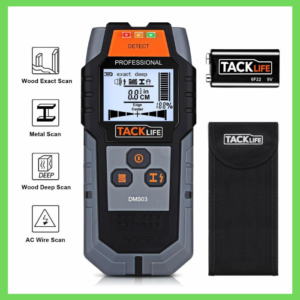
While you can mount any TV on a plasterboard wall without utilising studs, it is much better if you can. Sometimes relying on the stud might restrict where you can put the TV but as we mentioned before, you can rely on spring toggle fixings if there are no studs in the position you choose. A stud finder is a handy tool that helps you locate the wooden beams in the wall.
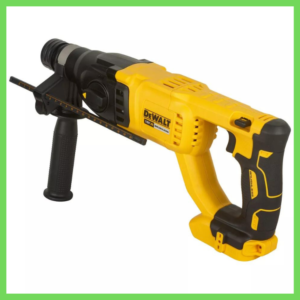
3. Drill
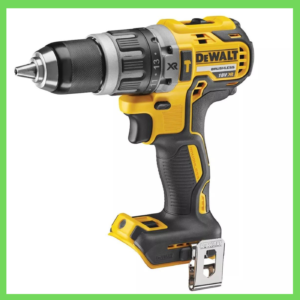
You’ll need a drill to make holes for the wall plugs and screws that will hold the mounting bracket. Make sure you have the right size drill bits for the screws and wall anchors. A cordless drill is handy for maneuverability, especially if you’re working in tight spaces. Your drill can double as a screwdriver as well although we don’t recommend using this for screwing the arms to the TV. You should use a handheld screwdriver for this until you are more confident with using your drill.
4. Drill Bits
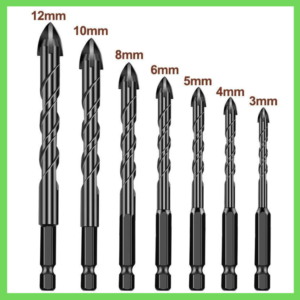
Your drill won’t be of much use without these. We recommend this set of bits as they will be able to make a hole in most wall types. The size of the drill bit you’ll need will depend on the size of the wall plug you are using. We always recommend using the bit one size smaller than the wall plug. So if you have a size 7 wall plug, you will want to use a size 6 drill bit. It’s better if the plug is a tight fit so feel free to use your hammer to tap in the wall plug if it gets a bit stuck
5. Wall Plugs
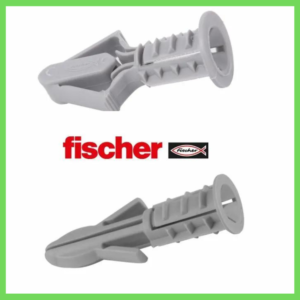
Speaking of wall plugs, these as well will come in many shapes and sizes. You should get some of these with the mount kit but sometimes, what they provide is not suitable for your use. We find these plugs to be a great option as although they are designed for use with plasterboard, they work well in brick and concrete walls as well.
6. Hammer Drill
Two drills might seem excessive, and if this is a one-off adventure for you, it may not be necessary. However, if this is the beginning of your journey to becoming a ninja, this will be a handy investment. Sometimes you will come across some walls that will resist the force of your normal drill. That’s where the hammer drill comes in. This machine will be able to make a hole in any wall.
7. Level
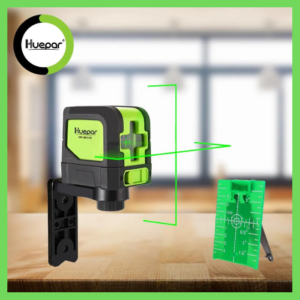
Trust us, you don’t want to finish the job and realize your TV is crooked. No one wants to mount any Tv and have it crooked. A level ensures that your TV is perfectly straight. A laser level can be a game-changer, projecting a straight line across your wall to guide your mounting.
8. Measuring Tape
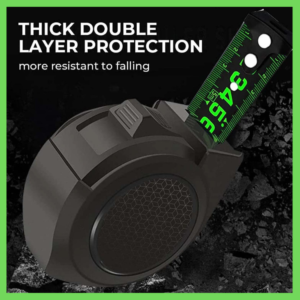
You’ll need this to measure the distance between the holes on the TV mount and the corresponding spots on the wall. Accurate measurements make for a smooth installation. You’ll need to measure both the wall and the mounting holes on the TV. The number one rule – Measure twice, drill once. It saves you from making unnecessary holes in your wall.
9. Spring Toggle Clips
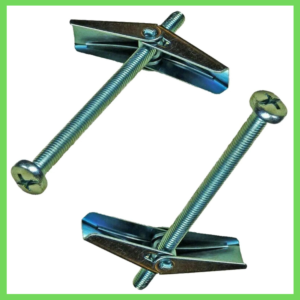
These are essential if you’re mounting the TV on drywall and are not hitting any studs. You can be confident that your TV will stay in place with spring toggle clips. You will want to get the right size drill bit for these in the wall though
10. Socket and Screwdriver Set
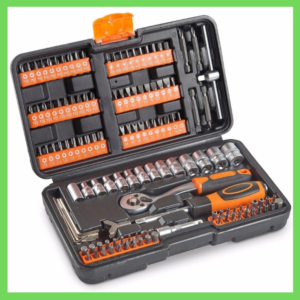
This set should have all you need to tighten the nuts and bolts that come with your TV mount. This set will provide you with various sizes that you may need. Many times the screws you get will have a hex head and that is where the socket set will come in handy. This kit even includes the arm so you can attach the sockets to your drill if you need a little extra punch to drive them in.
11. Hammer
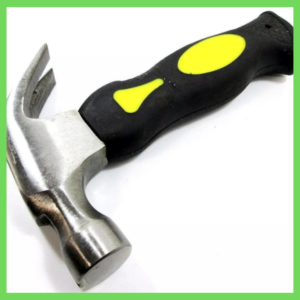
Sometimes, you’ll need a little persuasion to get things into place. Plus, it’s handy for adding anchors if you’re not hitting studs. Don’t go overboard with the hammer; gentle taps are usually all you need.
12. Screws and washers
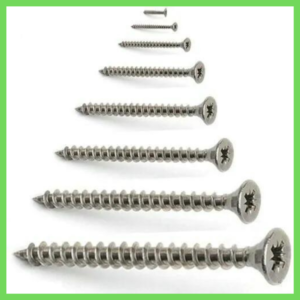
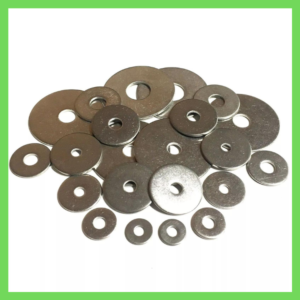
Inevitably, you will want to have more screws to help you with mounting your flat-screen TV. The kits normally will come with 4 screws to secure the bracket to the wall which in some cases can be enough but often, you will want that little extra support for your own piece of mind. Due to the size of the holes in the brackets, screws on their own will not be enough. Hence why we recommend having some washers in your kit.
13. Filler
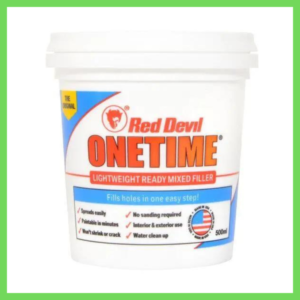
Don’t beat yourself up if you’ve put holes in the wrong place. It happens to the best of us at times. That’s what filler’s for. Just fill the hole with some of this, give it the appropriate time to set, then lightly sand it down and then paint if necessary.
14. Helper
Okay, not exactly a tool, but having an extra pair of hands can be incredibly helpful when you mount any TV. Some TVs can be heavy and awkward to hold, so recruit a friend or family member to help you out. Oh, and you might also need a pencil to mark the wall for the holes.
Step-by-Step: Mounting Your TV
Now that you’ve got all your tools, let’s quickly go over the basic steps to get your TV up on the wall:
- 1. Choose the Perfect Spot: Before you mount any TV, you will want to decide where to put it. Make sure it’s at a comfortable viewing height and there’s an outlet nearby for power. The general rule is to make sure the centre of the TV is around eye level when sitting down. This is to avoid having to tilt your neck for long period causing neck strain.
- 2. Find the Studs: Using your stud finder, try to locate the studs if you’re mounting on the plasterboard. Mark the edges of the studs with your pencil. We recommend using a small drill bit (1mm), to drill through the plasterboard and confirm that the stud is there
- 3. Attach the Mounting Plate to the TV: Secure the mounting plate, or the mounting arms depending on the kit, to the back of your TV using the screws provided with the mount.
- 4. Position of the Mount: With the TV face down and the arms placed on the back of the TV, put the bracket on. Now with your tape measure, measure the distance from the top of the bracket to the top of the TV. Don’t make the understandable mistake of putting the bracket at the height of the TV. The TV will sit above the bracket.
- 5. Mark Your Drill Holes: Hold the TV mount up to the wall and use the level to ensure it’s straight. Mark where you will drill the holes. Some mounts have many holes and you won’t need all of them but this is your judgment call as it will depend on the weight of the TV and the integrity of the wall.
- 6. Drill the Holes: Use your drill and the appropriate bit to make holes for the screws. At the location where you’re not hitting studs, insert spring toggle fixings into the holes. You will probably need to use washers when putting them on the mount.
- 7. Attach the Mount to the Wall: Use your screwdriver to secure the mounting bracket to the wall with screws.
- 8. Hang the TV: With your helper, lift the TV and hang it on the mounting bracket. Make sure it’s securely in place.
There you have it! Your TV is now mounted on the wall, ready for movie nights, binge-watching sessions, or just as a token of your handyman skills.
When you take on the task to mount any TV, it might seem daunting when you haven’t done it before, but with the right tools and a bit of patience, you can definitely do it yourself. That being said, if you feel better leaving it to a professional, feel free to contact us. We offer a remote mounting service, where via video, we can provide guidance and support to help you through mounting your flat-screen TV.